Hand-Painted Flower Pots are a fun and easy way to bring a pop of color and personality to your home or garden. You can use any plain pots and turn them into beautiful, one-of-a-kind pieces with a little paint and creativity. Whether you go for vibrant flowers or a more subtle design, these pots are perfect for sprucing up your space. Let’s dive into how you can make your own hand-painted flower pots, adding a personal touch to your plants and giving them a fun new home!
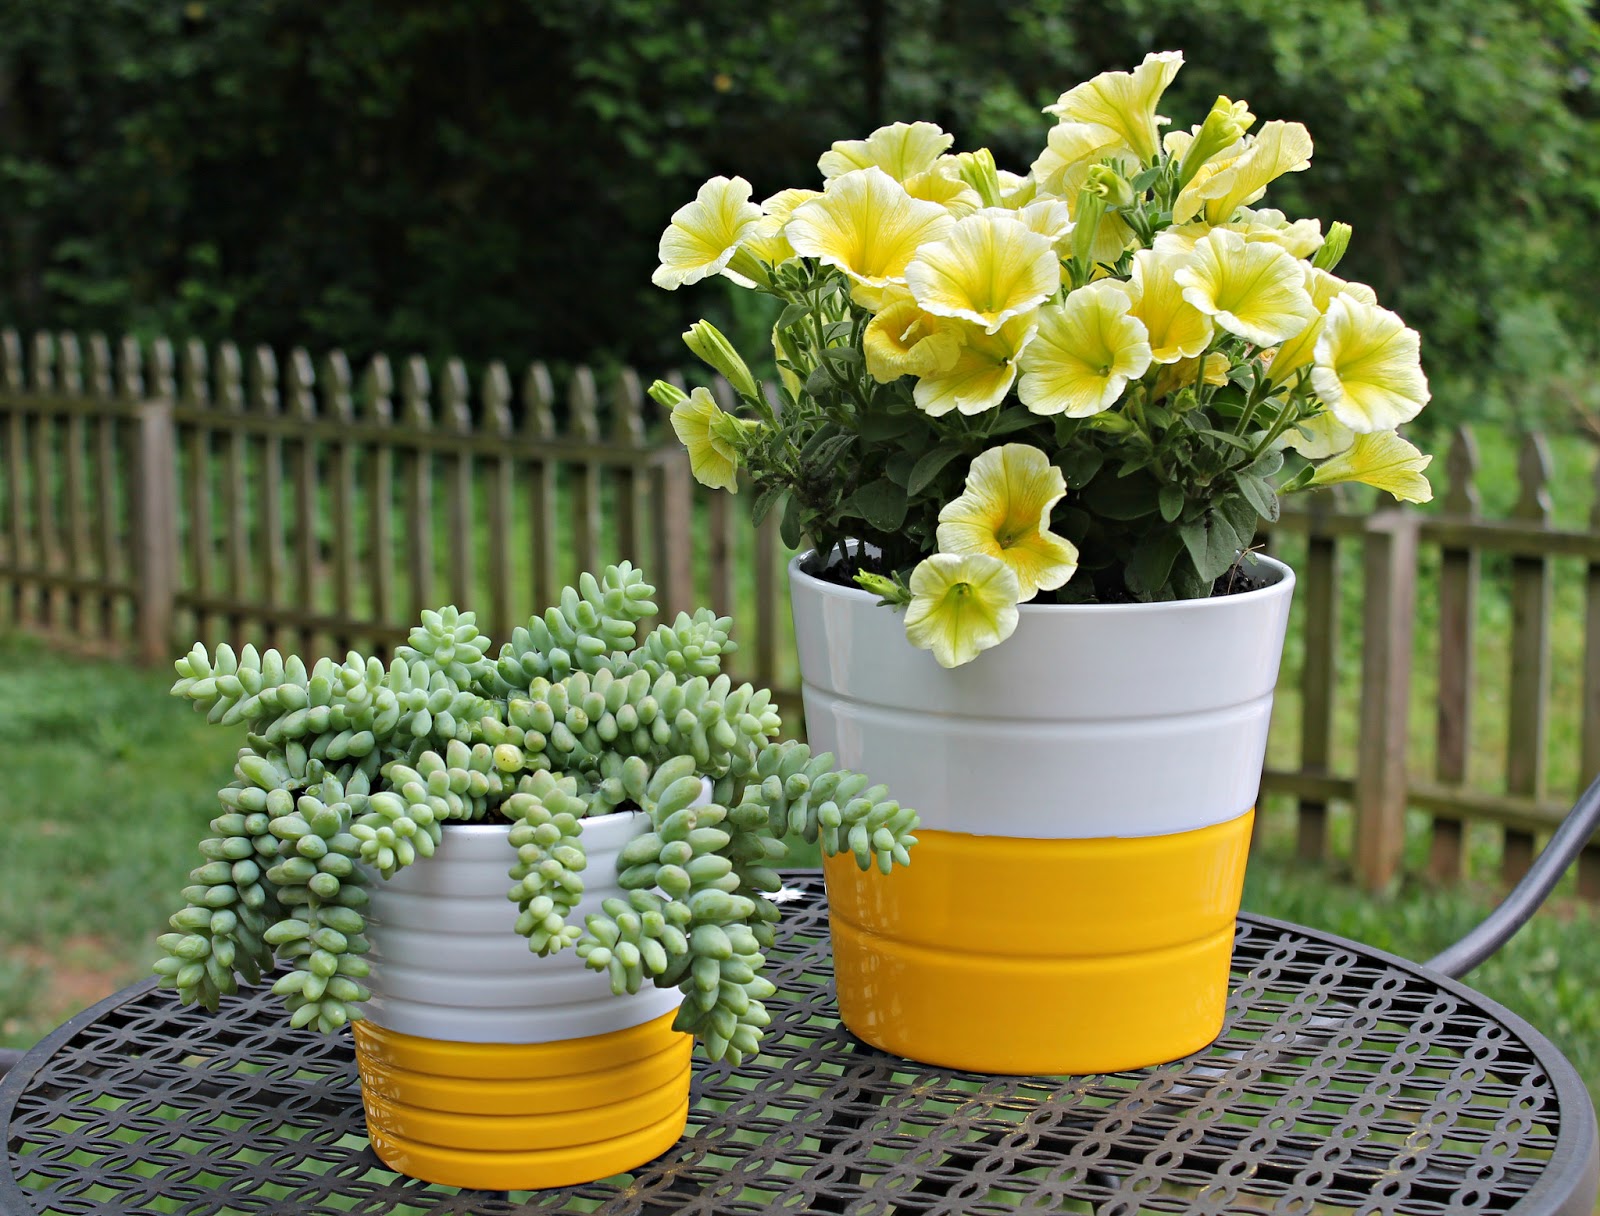
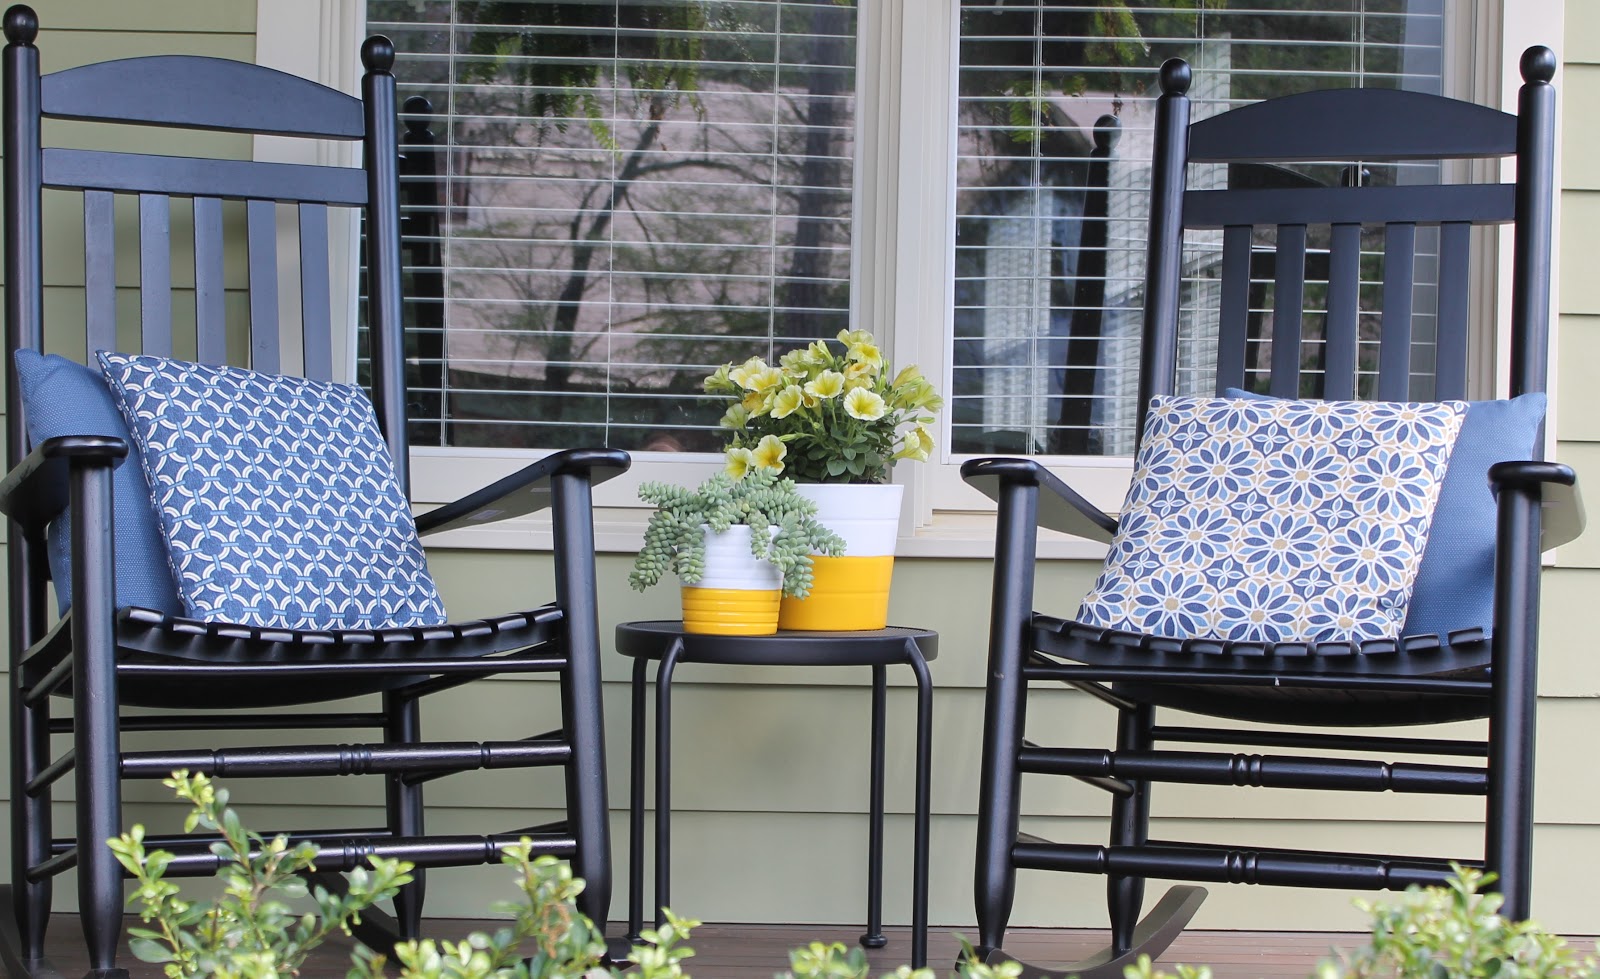
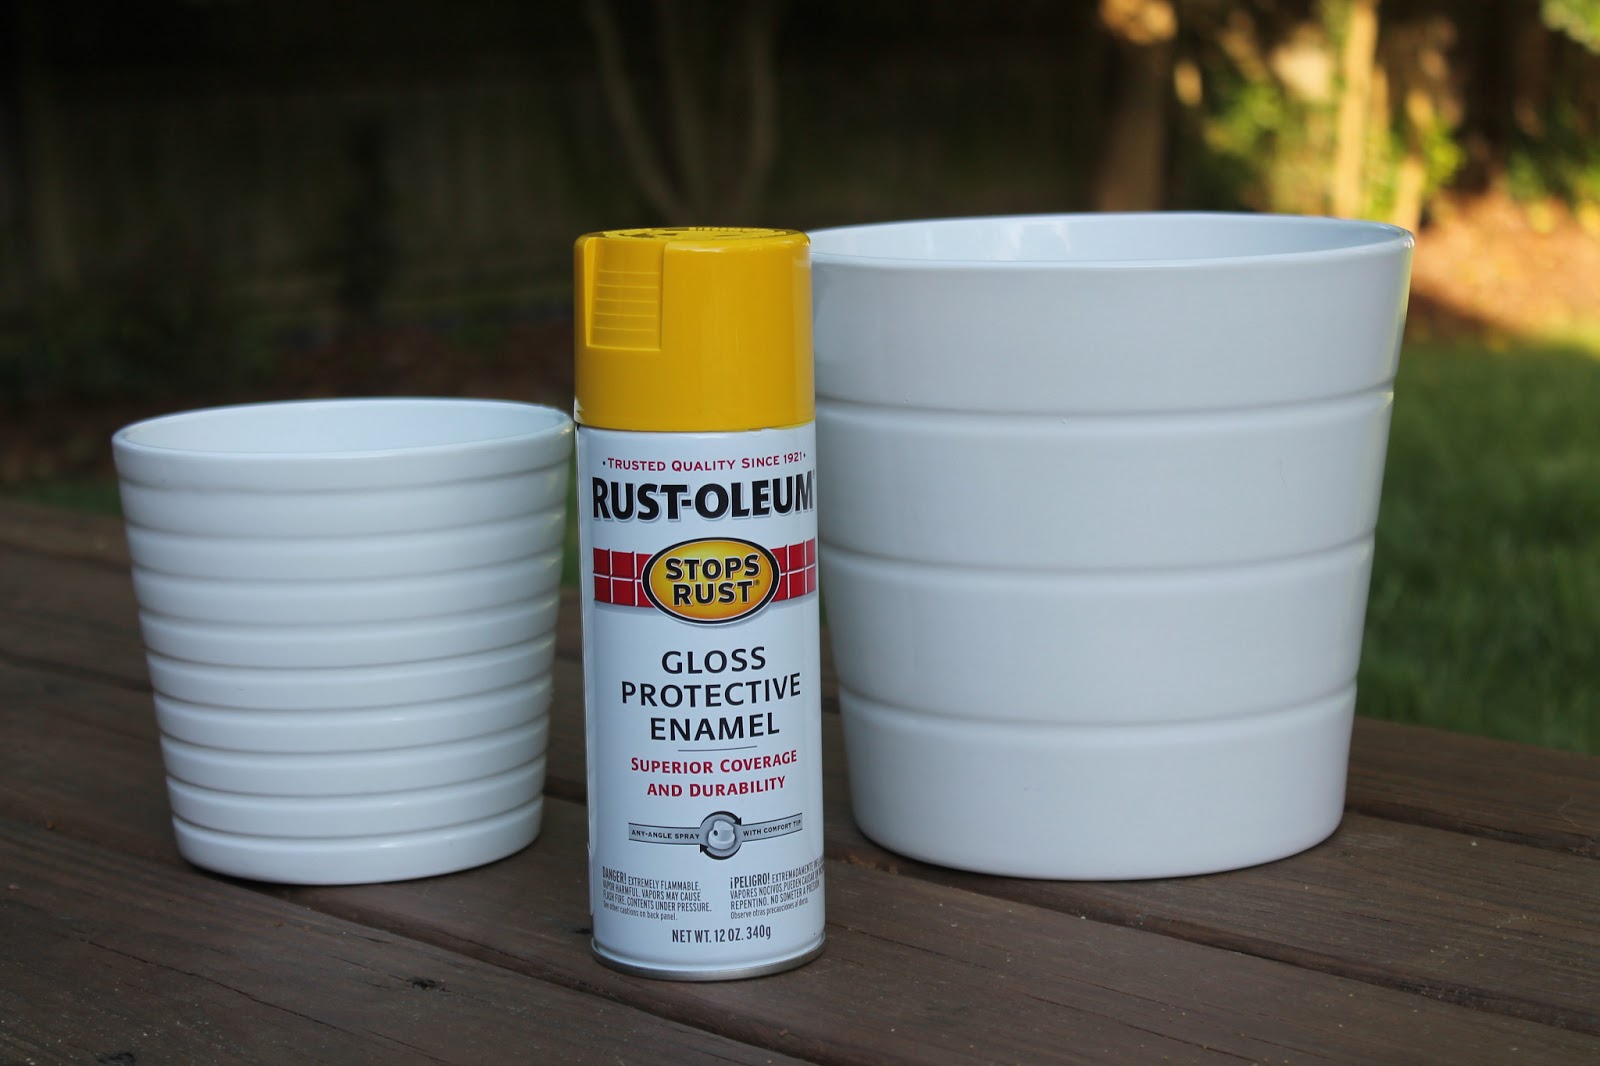
I found a pot of Burro’s Tail for $10 at Home Depot (you can also find it on Amazon!) and the perfect pots from IKEA (you can also find them on Amazon)! Then I decided to add a pop of color with bright yellow spray paint! I love how they turned out.
Hand Painted Flower Pots Instructions
- Prepare the Pot
Start by cleaning your flower pot to remove any dust or debris. You can wipe it down with a damp cloth and let it dry completely before beginning your painting. - Apply Painter’s Tape
Now comes the fun part! Use painter’s tape to create clean lines or geometric patterns on your pot. You can tape off stripes, angles, or even abstract designs—whatever your heart desires! Press the tape down firmly so that the paint doesn’t seep under it. - Choose Your Paint Colors
Pick your favorite acrylic paint colors. You can go bold and bright or keep it simple with pastel tones—whatever matches your style. Pour the paint onto a plastic plate or palette to make it easy to dip your brush. - Paint Around the Tape
Using a medium-sized paintbrush, begin painting around the tape. Be sure to apply an even coat of paint and work carefully to avoid painting over the tape. You can use multiple colors and let each layer dry before moving on to the next. - Let It Dry
After painting your desired design, let the pot dry completely for at least an hour. Once dry, gently peel off the painter’s tape to reveal the clean lines and design underneath. - Add More Details (Optional)
If you want to add more details, feel free to use a small paintbrush to create accents, dots, or any other designs on top of your base paint. You can also add a second layer of paint for a more vibrant look. - Seal It (Optional)
For extra durability, especially if you’re using the pot outdoors, you can seal your design with a clear acrylic sealer. Just spray a light coat over the painted areas and let it dry completely. - Plant It Up
Once your hand-painted flower pot is all done and sealed (if you chose to do that), it’s time to add your favorite plant! Fill the pot with soil and plant a beautiful flower, succulent, or herb.
Enjoy your unique, custom-painted flower pot that adds a fun and personal touch to your home or garden!