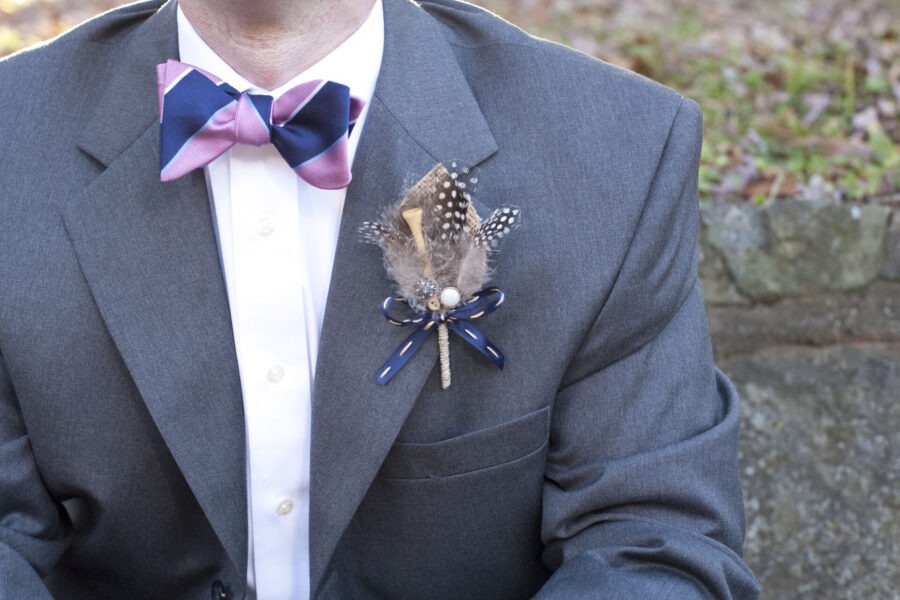
If you’re looking for a fun, budget-friendly way to add a personal touch to your big day (or any special event), making a DIY boutonniere is a great project! I saw this adorable burlap boutonniere idea in a magazine and couldn’t resist giving it a try for our wedding day.
These are super customizable – you can pick your favorite colors, add little details that mean something special, and really make them your own. Plus, they’re a great way to save some cash compared to buying pre-made ones.
Let’s dive into how you can create these cute and crafty boutonnieres for your next celebration!
These took way more time and effort than I expected, but oh my gosh, I am obsessed with how they turned out! Seriously, they were totally worth the work. Not only are they ridiculously cute, but they ended up being super affordable too! I love how something so simple and budget-friendly can make such a big impact. Plus, knowing I made them myself just makes them feel even more special. Trust me, if you’re on the fence, the effort is 100% worth it for how adorable and personalized these look!

DIY Boutonniere Supplies
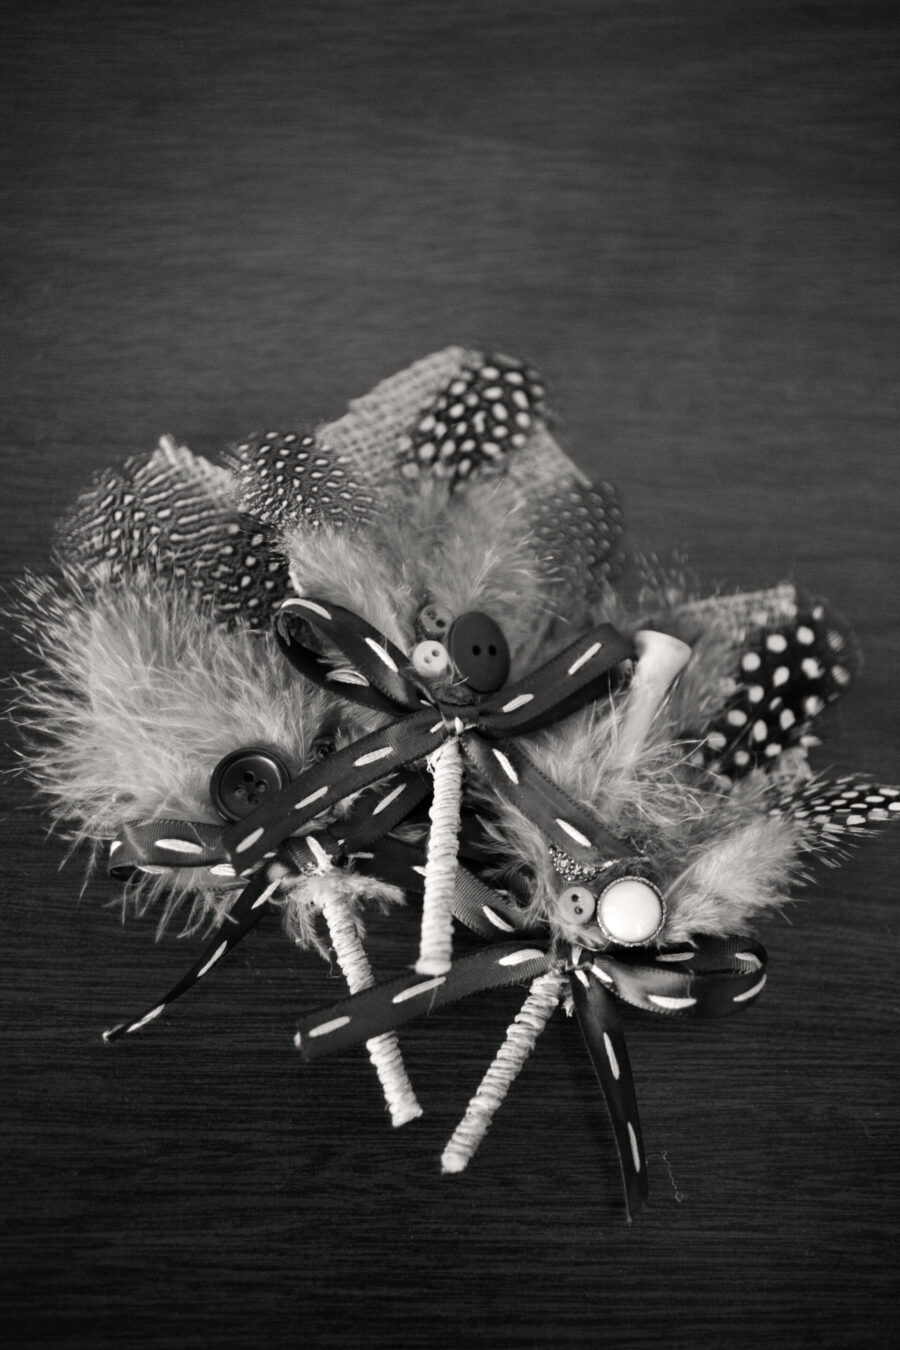
Making a burlap boutonniere is an easy and creative way to add a rustic touch to any special event. These boutonnières are perfect for weddings, anniversaries, or any celebration that needs a little extra charm. Here’s how to create your own unique boutonniere using simple materials:
What You’ll Need:
- Burlap fabric
- Stiff cardboard or cereal box material
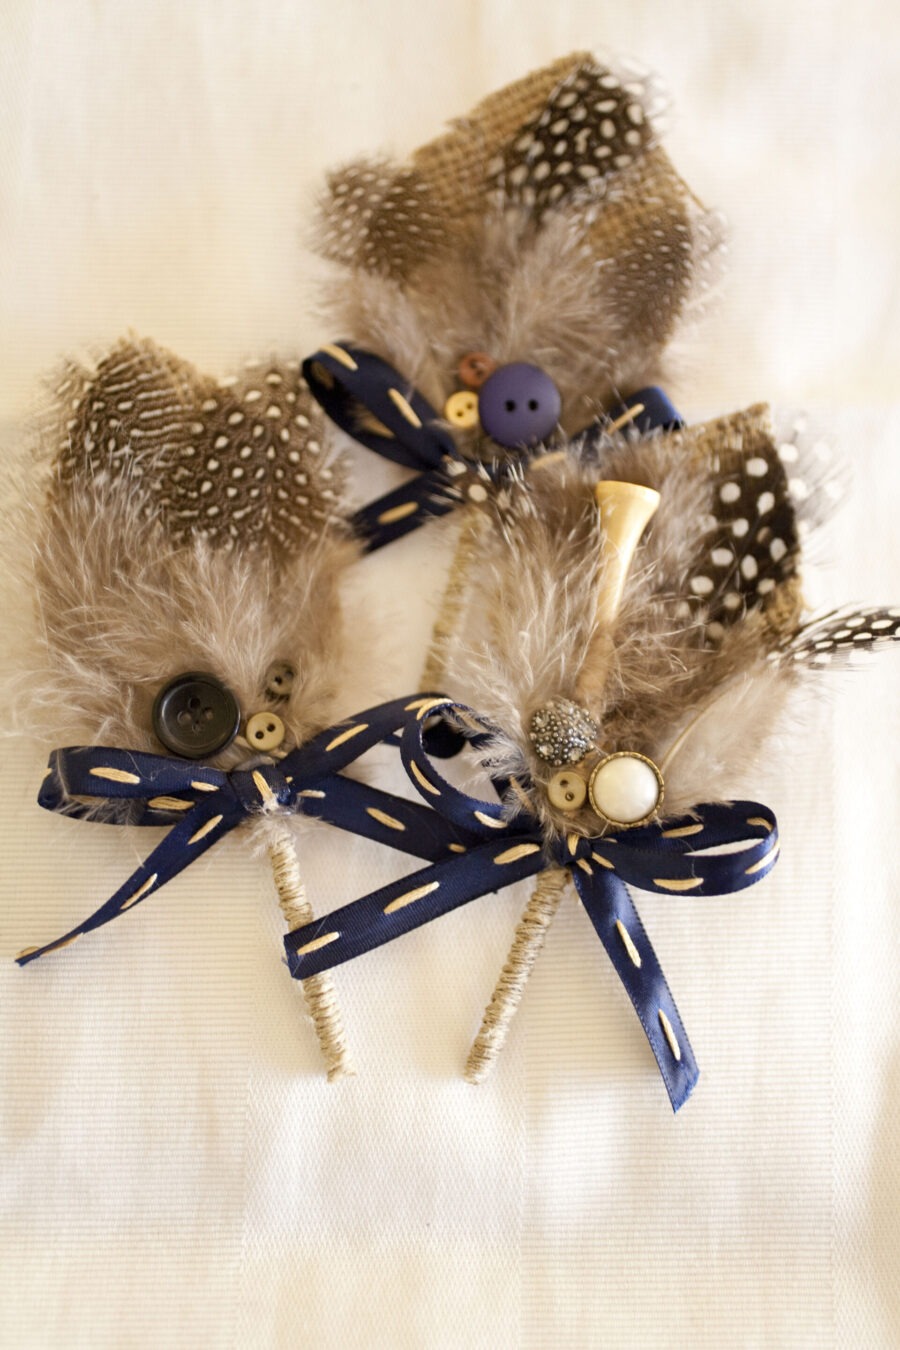
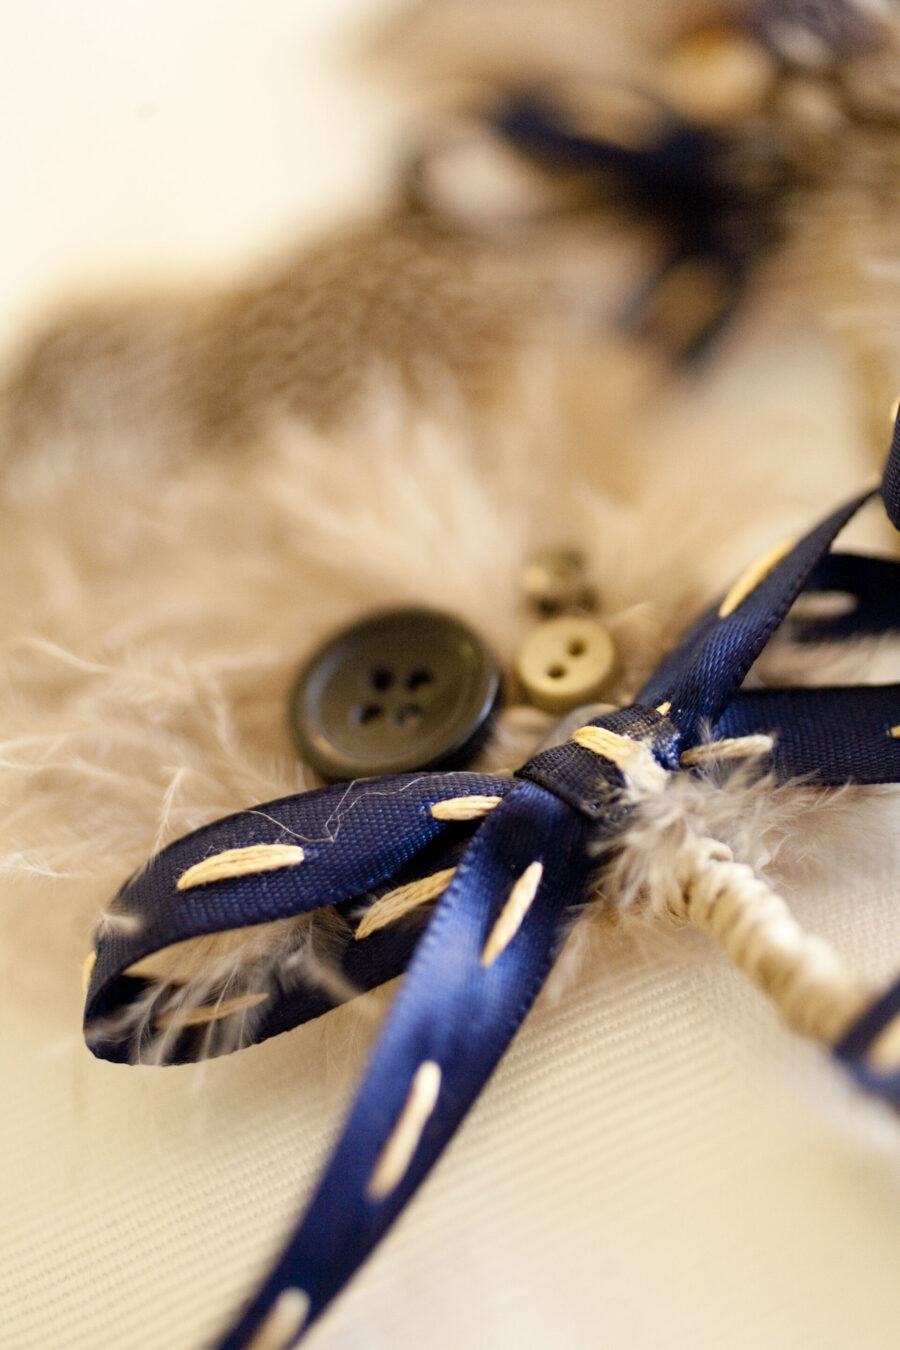
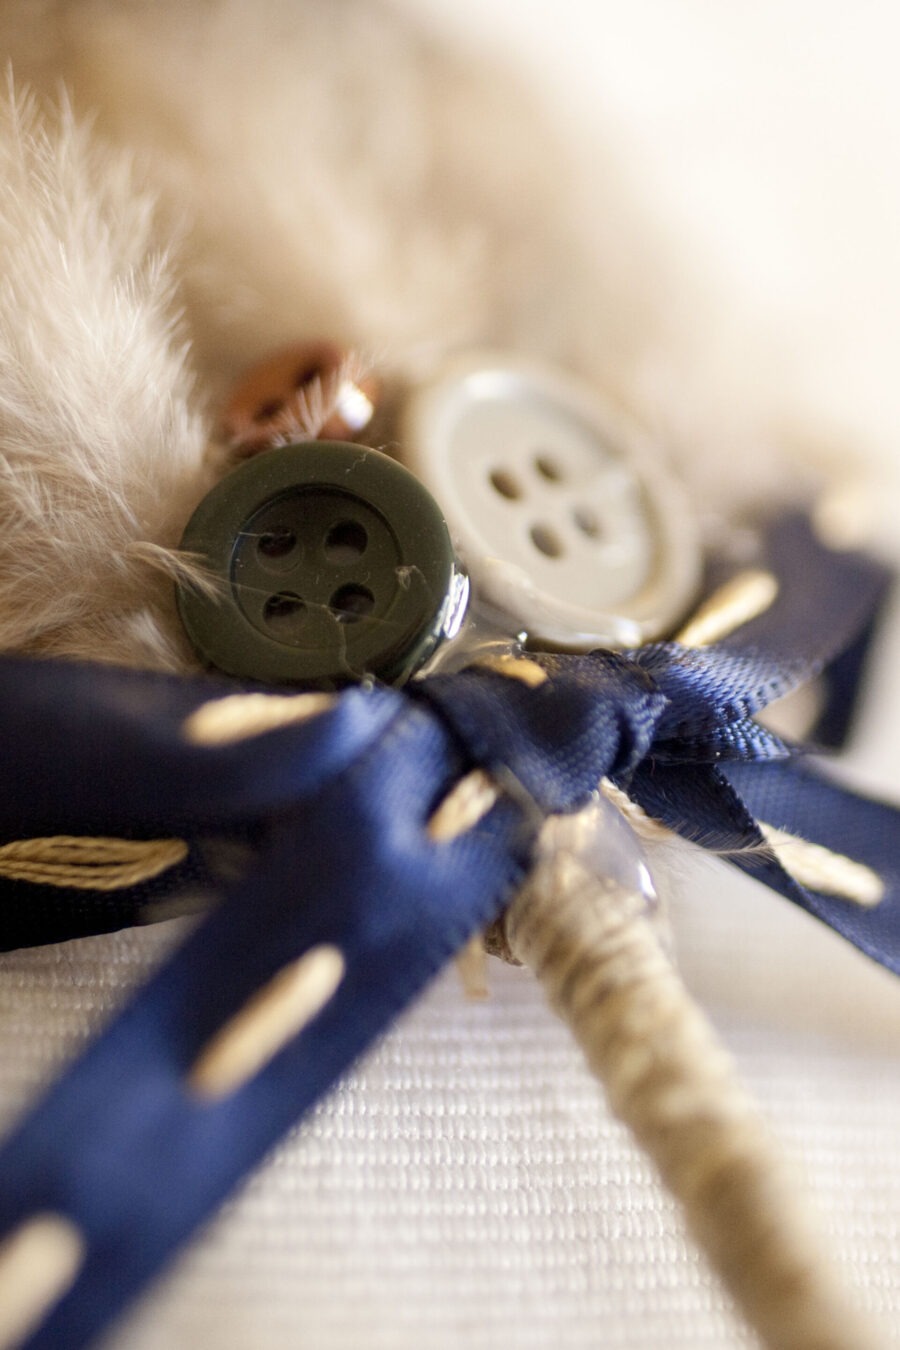
- Buttons (3 different types)
- Feathers (two kinds)
- Pin backs
- Natural jewelry cord
- Hot glue gun & Elmer’s glue
- Ribbon (3/4” wide)
- Embroidery floss & a large needle (optional)
- Bamboo skewers
Step 1: Cut Out the Leaf Shapes Start by drawing the shape of the leaves on your cardboard. Cut them out, and use them as a template to cut the same shape out of your burlap fabric.
Step 2: Attach the Burlap Apply a little bit of Elmer’s glue on the cardboard’s natural side, then press the burlap pieces down onto the cardboard. Trim any excess fabric.
Step 3: Optional Layering For more depth, you can make a slightly larger burlap leaf using the same template, then glue it on top of the smaller leaf. This adds dimension and makes the boutonniere sturdier.
Step 4: Prepare the Skewers Cut your bamboo skewers to about 3.75 inches. Carefully score and break them. Attach one to the center of each leaf shape with a hot glue gun.
Step 5: Wrap the Stem Take the jewelry cord and glue one end at the bottom of the skewer. Then, gently wrap it around the skewer, adding a little hot glue every inch or so to keep it in place.
Step 6: Create the Bow Cut a length of ribbon and sew a running stitch down each side of the ribbon. Tie the ribbon into a bow once you’re done sewing. For an extra touch, you can use embroidery floss to create a rustic, textured look.
Step 7: Add Feathers and Buttons Glue a layer of soft white feathers to the boutonniere. Next, add a second layer of fun polka-dotted feathers. Finish by gluing on a few buttons, overlapping them if you’d like.
Step 8: Assemble and Secure Glue the larger burlap leaf to the back of the smaller one. Attach the pin back to the bottom so it’s easy to wear. If you want the boutonniere to tilt slightly when pinned, attach the pin back at a small angle.
Step 9: Final Touches Once everything is glued together, let it dry and your beautiful burlap boutonniere is ready to wear! This simple yet charming accessory will add a personalized touch to any outfit.
DIY Boutonniere
I made 15 boutonnieres in total for the groom, groomsmen, dads, grandpa’s, ushers, and brother.
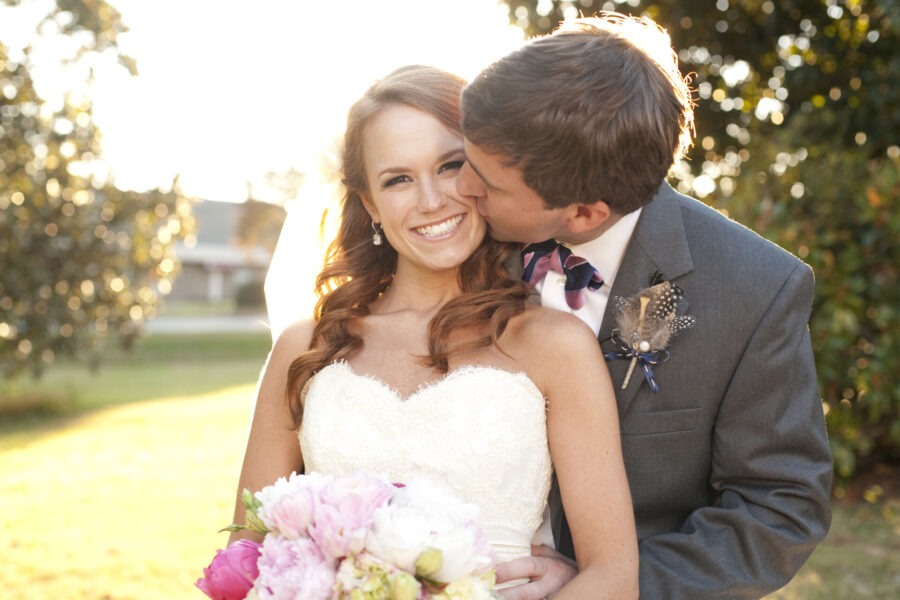
I wanted to make Matt’s boutonniere extra special, so I added a golf tee {he is a big time golfer} to his!
Other DIY Projects You May Like